

Introduction

In this complete guide on how to change a tire step by step, we cover everything from basic safety rules to final tightening.
Picture this — you’re driving down a quiet road, music playing, everything fine, and then you hear it. That dreaded thump and wobble that every driver fears. A flat tire.
Most people panic in that moment. But here’s the truth — changing a tire is one of the most straightforward car skills you can learn, and once you’ve done it once, you’ll never feel stranded again.
Whether you’re driving through the English countryside or cruising down an American highway, this guide walks you through exactly how to change a tire step by step — safely, quickly, and with zero stress.
Why Knowing How to Change a Tire Could Save Your Day
Here’s something most driving schools don’t emphasise enough — knowing how to change a tire step by step means a flat tire doesn’t have to ruin your day, no matter where you are or what time it is.
Knowing what to do means:
• ✅ No waiting hours for roadside assistance
• ✅ Save money on call-out fees
• ✅ Stay safe and in control
• ✅ Build real confidence behind the wheel
What You’ll Need Before You Start
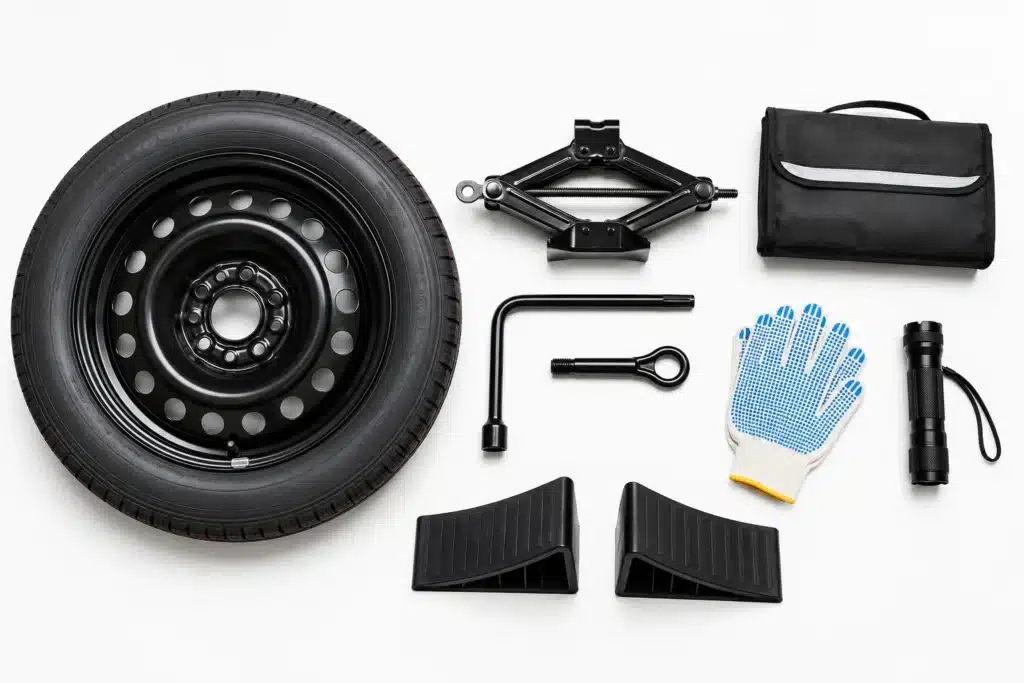
1. Spare Tyre
Your spare tyre is your most important piece of equipment. Before anything else, check it’s fully inflated and in good condition. A damaged or flat spare is no use to anyone. Know where it’s stored in your vehicle — usually in the boot or underneath the car.
👉 For official UK tyre safety guidance, visit TyreSafe — UK’s Tyre Safety Authority
2. Car Jack
Lifts the car safely. Always check your owner’s manual for the correct jack type for your car.
3. Lug Wrench (Wheel Brace)
Loosens and tightens your wheel nuts. Make sure it fits your car’s bolt size
4. Wheel Chocks
Stop your car from rolling while it’s lifted. Small but genuinely life-saving.
5. Gloves & a Torch
Tyres are dirty. Gloves protect your hands. A torch helps if you’re changing a tyre after dark.
Essential Safety Rules — Read This First
Before learning how to change a tire step by step, it’s important to follow a few safety basics.

🔴 Never stop on a bend or hill
🔴 Switch on hazard lights immediately
🔴 Apply the handbrake firmly
🔴 Stay away from traffic at all times
🔴 Wear a high-visibility vest if you have one
Pro Tip: On a busy motorway? Stay in your car with your seatbelt on and call for roadside assistance. Safety first — always.
7 Simple Steps to Change a Tire Step by Step
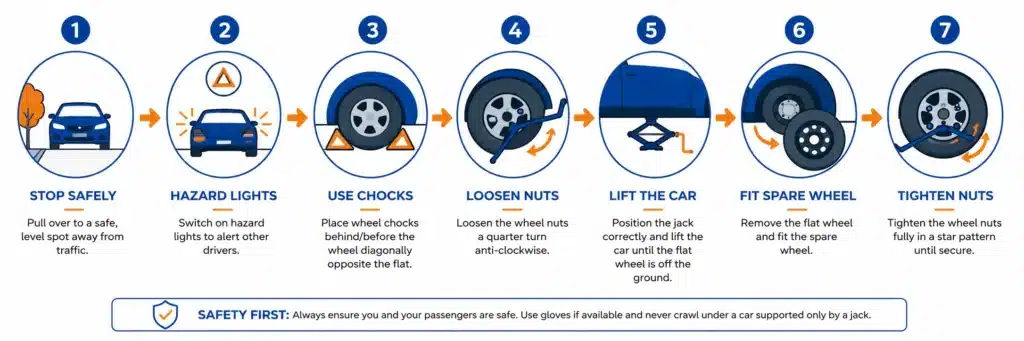
✅ Step 1 — How to Change a Tire Step by Step Starts With Finding a Safe Spot
The moment you notice a flat, don’t brake suddenly. Ease off the accelerator and slowly pull over to a safe, flat surface.
Avoid stopping on:
• Slopes or hills
• Soft ground
• Narrow busy roads
✅ Step 2 — Switch on Hazard Lights & Apply the Handbrake
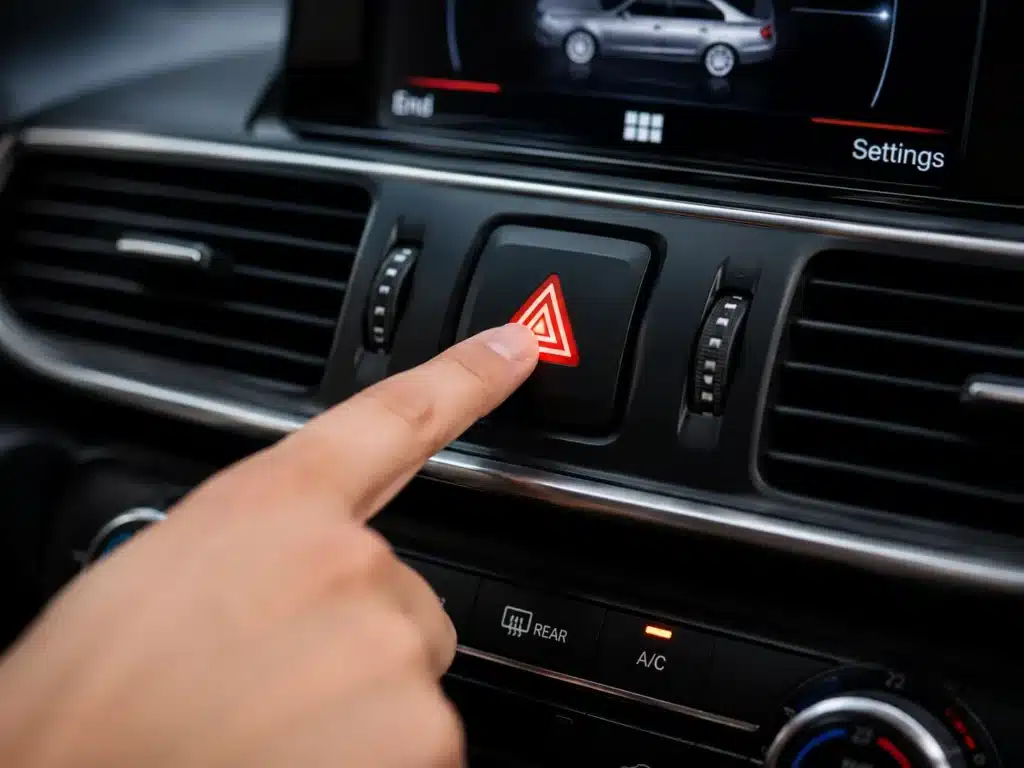
Immediately turn on your hazard lights and apply the handbrake firmly. Put the car in first gear (manual) or “Park” (automatic).
✅ Step 3 — Place Wheel Chocks for Extra Security
Position wheel chocks behind the tyres on the opposite end of the car from the flat. This prevents any chance of rolling while the car is lifted.
✅ Step 4 — Loosen the Lug Nuts Before Lifting
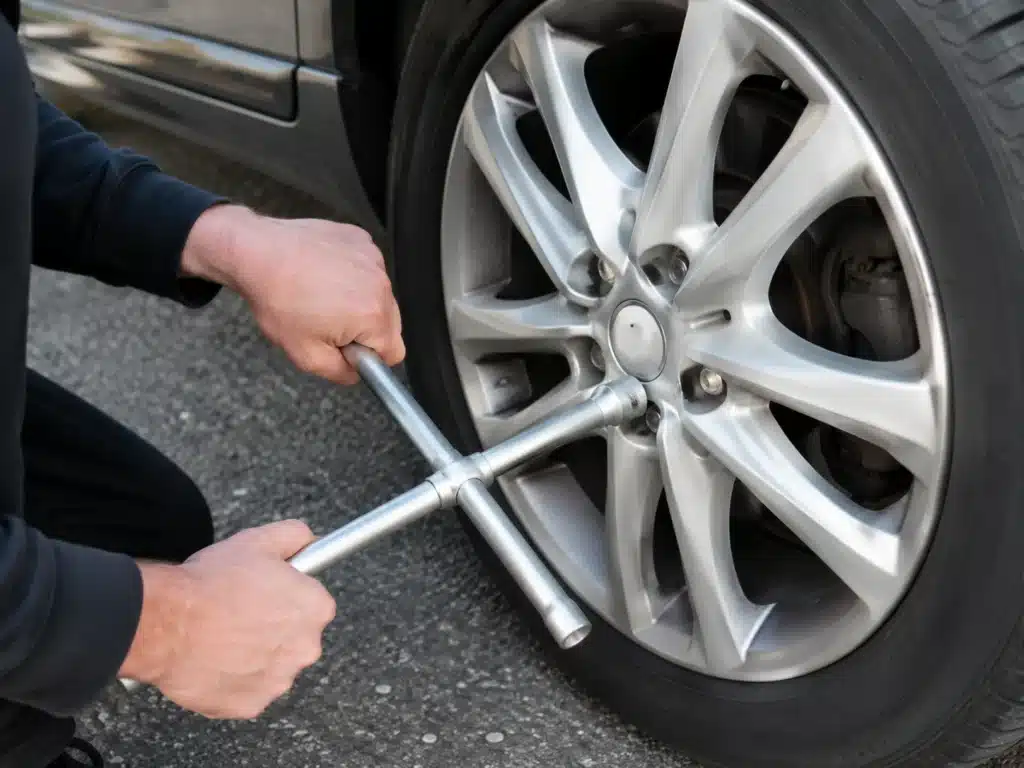
Turn each nut counter-clockwise while the wheel is still on the ground. Don’t remove them yet — just break their grip.
Remember: Lefty loosey, righty tighty — the most useful rhyme in car maintenance!
✅ Step 5 — Jack Up the Vehicle Correctly
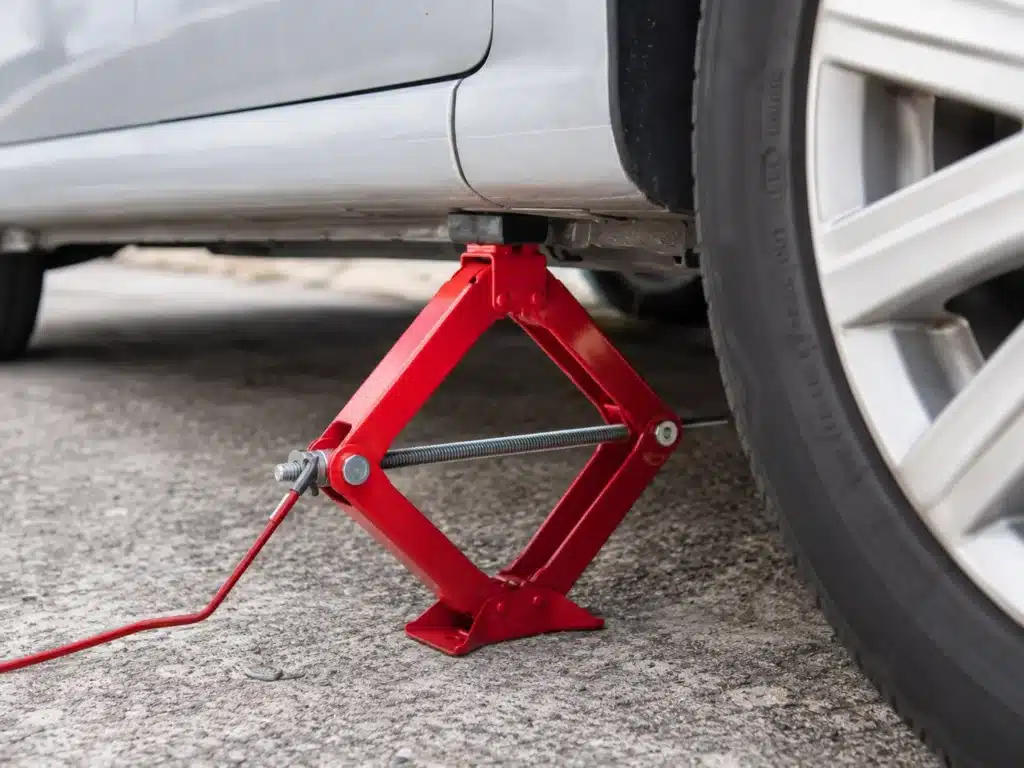
Find the correct jacking point in your owner’s manual. Slowly raise the vehicle until the flat tyre is about 6 inches (15cm) off the ground.
⚠️ Never place any part of your body under a car supported only by a jack.
✅ Step 6 — Remove the Flat Tyre & Fit the Spare
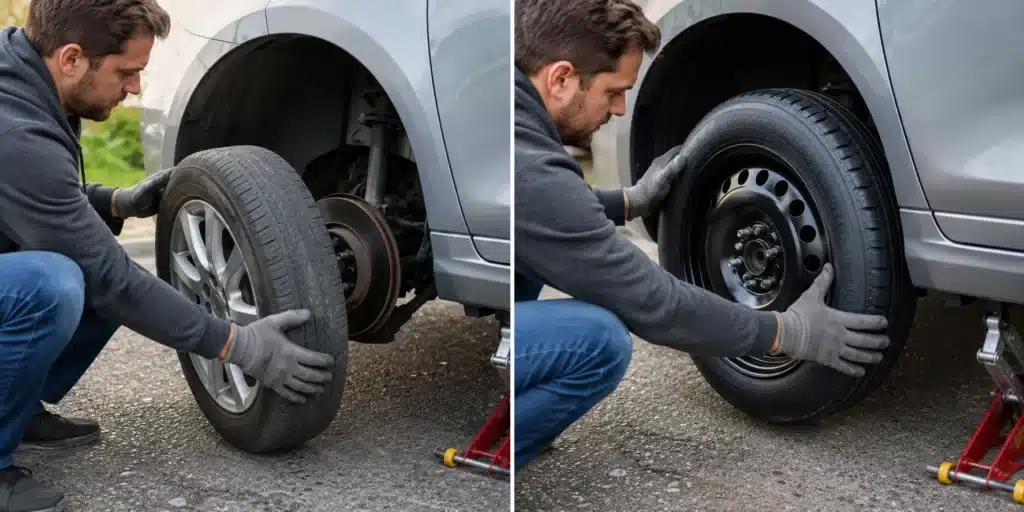
Remove the lug nuts and pull the flat tyre off. Line up the spare with the wheel studs, push it firmly onto the hub, and hand-tighten the lug nuts in a star/criss-cross pattern.
✅ Step 7 — Lower the Car & Tighten Everything Up
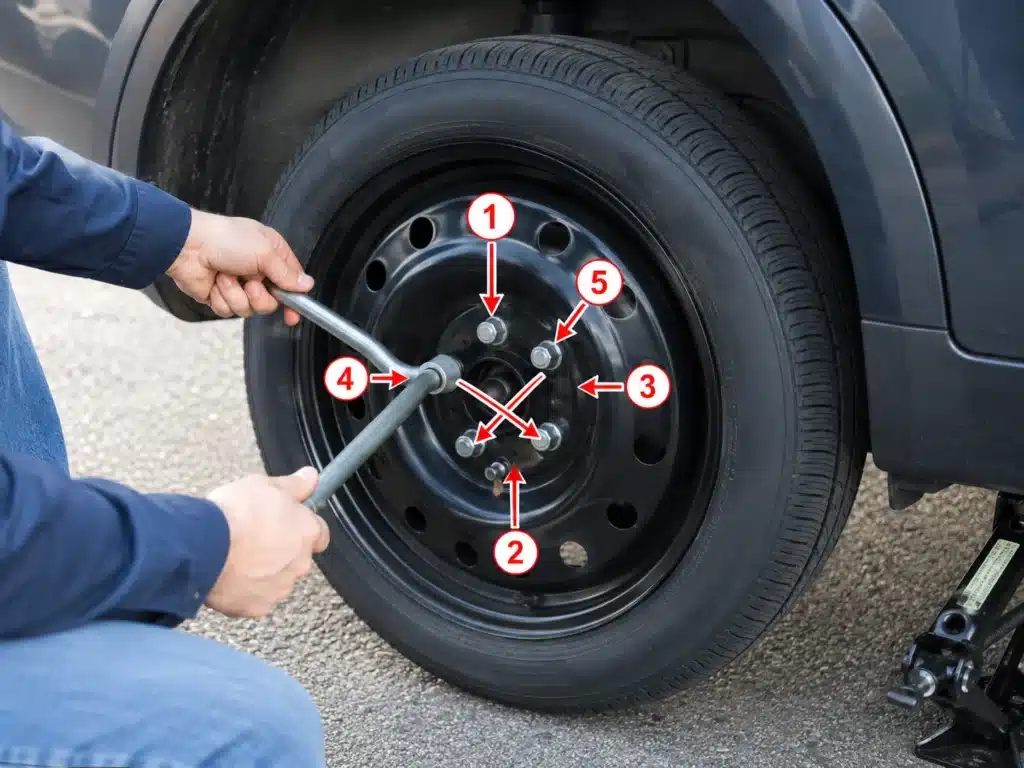
Lower the jack slowly until the car rests fully on the ground. Now firmly tighten each nut in the criss-cross pattern. Give every nut a final check before driving.
After the Change — 4 Important Steps People Forget
Once you’ve completed how to change a tire step by step, a few final actions will keep you safe on the road ahead.

1. ✅ Check the Spare Tyre’s Air Pressure
Head to the nearest petrol station and check the PSI matches your car’s recommended level.
2. ✅ Store Your Tools & Flat Tyre
Put everything back in the boot — the flat tyre may be repairable and save you money.
3. ✅ Drive Gently to a Tyre Shop
If on a temporary spare, stay below 50 mph (80 km/h) and avoid motorways.
4. ✅ Get the Flat Tyre Professionally Inspected
Many punctures are a quick, cheap fix. Don’t throw the tyre away before checking!
For more ways to keep your vehicle running smoothly, check out our complete guide on car maintenance tips UK 2026.
Expert Tips & Mistakes to Avoid
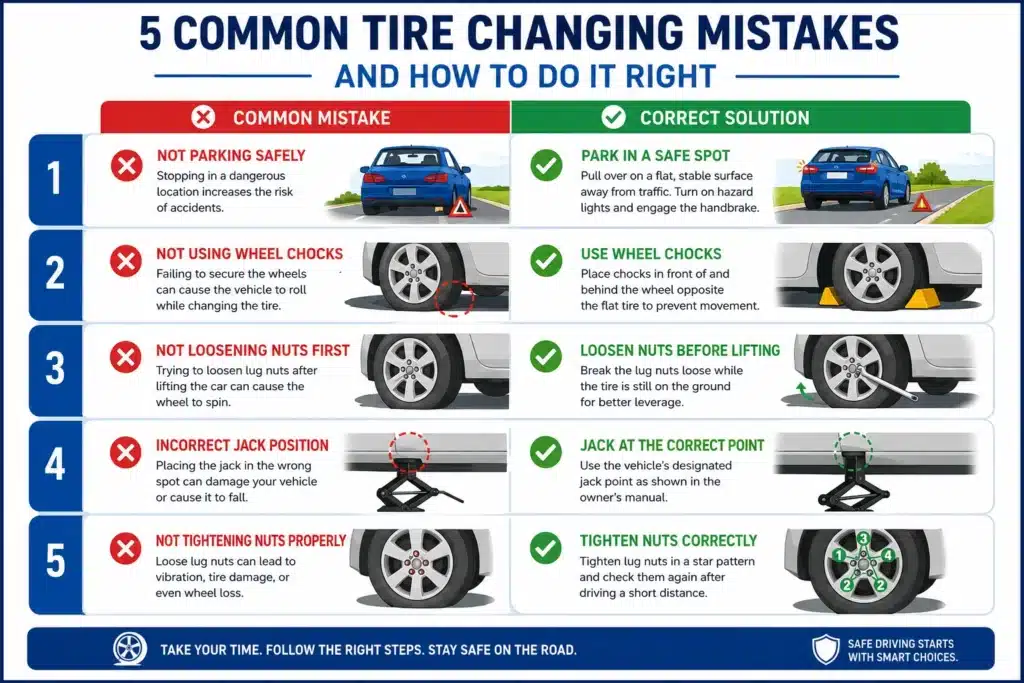
When using your lug wrench, loosen the lug nuts in a counter-clockwise motion before lifting the car. Loosening them while the wheel is still on the ground prevents it from spinning and reduces the risk of injury. Do not remove them completely yet — just break their tight grip.. Loosening them at the same time as the wheel continues to be at the ground prevents it from spinning and reduces the danger of injury. Do no longer dispose of them without a doubt however; simply wreck their tight grip.
❌ Common Mistake
• Wrong jack point
• Forgetting the handbrake
• Tightening one nut at a time
• Speeding on a temp spare
• Not checking spare pressure
✅ What to Do Instead
• Check your owner’s manual
• Apply before anything else
• Always use a star/criss-cross pattern
• Stay under 50 mph, go straight to garage
• Test at the petrol station immediately
FAQs

How long does it take when you know how to change a tire step by step?
Most people complete it in 15 to 30 minutes with the right tools. It gets faster with practice.
Can I drive on a motorway with a temporary spare?
No. Temporary spares are limited to under 50 mph and short distances only.
What’s the most common mistake?
Wrong jack placement — always use your manual’s designated lifting points.
How do I know if my spare is still good?
Check the air pressure and visual condition — no cracks, no bulging. When in doubt, ask a professional.
Should I check pressure right after fitting the spare?
Absolutely yes — always verify PSI at the nearest petrol station before driving further.
“Now that you know how to change a tire step by step, you’ll never feel unprepared at the roadside again.”
Conclusion

Learning how to change a tire step by step is one of the most valuable skills any driver can have.
Changing a tyre might seem daunting the first time — but now you know exactly what to do, why you’re doing it, and how to stay safe throughout the whole process.
The seven steps are simple. The tools are basic. And the confidence you gain from handling it yourself? That’s priceless.
Keep this guide bookmarked, stock your boot with the right tools, and you’ll never feel stranded at the roadside again.
Drive safe — wherever the road takes you. 🚗